Salads
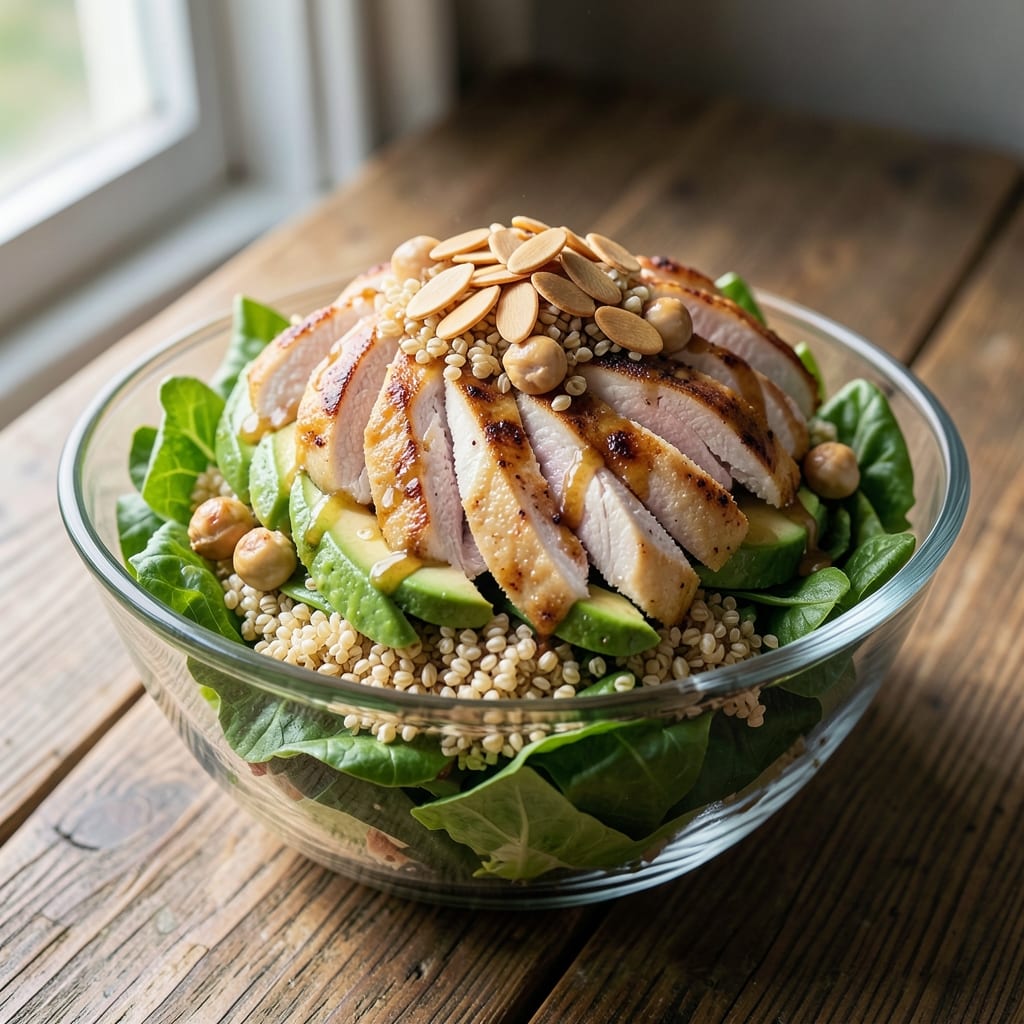
This 10-layer salad recipe transforms a simple bowl into a vibrant, restaurant-worthy masterpiece that keeps its freshness for days. 💛 The secret lies in strategic layering—starting with sturdy bases that won’t wilt, followed by proteins, grains, and crisp toppings that stay crisp even after refrigeration. I’ve perfected this method over years of meal prepping, ensuring every bite delivers a perfect balance of textures and flavors without soggy disappointment.
The foundation begins with crispy, sturdy greens like romaine or butter lettuce, topped with high-fiber grains (quinoa or farro) for substance. Each subsequent layer—grilled chicken, chickpeas, avocado, and toasted nuts—adds protein, plant-based richness, and crunch, while creamy dressings and zesty toppings tie everything together. The key is assembly order: dressings go last to preserve crispness, and toppings are added just before serving for maximum freshness.
What makes this salad exceptional is its versatility—customize layers for dietary needs (swap chicken for tofu, cheese for vegan feta) while maintaining visual appeal. The result? A colorful, nutrient-packed dish that’s as satisfying as it is beautiful, perfect for lunches, potlucks, or elegant dinners. Ready to elevate your salad game? Let’s build this layer by layer.
Pro tip: Use clear glass containers to showcase the stacked layers—it’s not just practical, it’s presentation gold. This salad isn’t just food; it’s a showstopper that proves healthy eating can be both nutritious and stunning. Let’s get started.
Ingredients for 10 layer salad
Strategically layered ingredients ensure vibrant colors and lasting crispness in every bite.
| Ingredient | Amount | Notes |
|---|---|---|
| Romaine Lettuce 🥬 | 2 whole | Heads, chopped into bite-sized pieces |
| Quinoa 🌾 | 1 cup | Uncooked, rinsed thoroughly |
| Grilled Chicken Breast 🍗 | 1 ½ lb | Boneless, skinless, sliced thin |
| Chickpeas 🌱 | 1 ½ cups | Cooked, drained, and rinsed |
| Avocado 🥑 | 1 whole | Ripe, sliced into thin strips |
| Almonds 🥜 | ½ cup | Sliced, toasted for crunch |
| Cherry Tomatoes 🍅 | 1 cup | Halved, vine-ripened preferred |
| Red Onion 🧅 | ¼ whole | Thinly sliced, soaked 5 mins |
| Cucumber 🥒 | ½ whole | English, thinly sliced |
| Feta Cheese 🧀 | ½ cup | Crumbled, optional for vegan |
| Balsamic Vinaigrette 🍯 | ½ cup | Store-bought or homemade |
| Lemon Juice 🍋 | 2 tbsp | Freshly squeezed |
| Olive Oil 🫒 | ¼ cup | Extra-virgin, cold-pressed |
| Salt 🧂 | 1 tsp | Diamond Crystal preferred |
| Black Pepper 🌶️ | ½ tsp | Freshly ground |
The romaine lettuce and quinoa form the salad's sturdy foundation—romaine must be crisp, so choose heads with tightly packed leaves and minimal wilting. For quinoa, Trader Joe's or Bob's Red Mill brands cook evenly and provide a neutral base that won't overpower other flavors. The grilled chicken should be sliced uniformly to maintain even texture throughout the layers. If you prefer plant-based protein, tofu or chickpeas work equally well when marinated and grilled to a similar texture. Avocado should be ripe but firm, as it softens further during layering—select fruits that yield slightly to gentle pressure.
For the cherry tomatoes, vine-ripened varieties like Heirloom or Sun Gold add natural sweetness, but any firm, unblemished tomatoes will work. The red onion needs a quick soak in cold water to mellow its sharpness—skip this step only if using sweet yellow onions. Substituting cucumber for zucchini? Use English cucumbers for fewer seeds and less moisture. For the feta, Kalamata olives or vegan feta can replace traditional cheese while maintaining a briny contrast. The balsamic vinaigrette should be tangy but balanced—store-bought options like Primal Kitchen are reliable, or mix olive oil, balsamic vinegar, Dijon mustard, and a touch of honey for a homemade version.
Layer ingredients in clear glass containers to preserve freshness and showcase presentation. The quinoa and greens go first, followed by proteins and grains, then crisp toppings. Dressing is added last to maintain crispness—store in the fridge for up to 5 days with a parchment paper barrier between layers. For longer storage, freeze individual components (like quinoa or grilled chicken) separately and assemble fresh when ready. Avocado and tomatoes should be added within 24 hours of serving to prevent browning, or toss with a bit of lemon juice to extend freshness.
Why You'll Love This Recipe
- No-Chop Necessary: Honestly, I just stack the layers—crisp romaine, toasted quinoa, and grilled chicken—without even breaking out the knife. The avocado gets sliced last so it doesn’t turn brown, and the chickpeas? Straight from the can, rinsed and ready.
- Creamy Without Dressing: That’s right—no soggy lettuce here. The avocado and chickpeas add natural richness while the grilled chicken brings smoky depth. Toss it all with a little lemon juice and olive oil, and suddenly, you’ve got a salad that sticks to your ribs.
- Lunch for Days: Between us, this is my meal-prep MVP. I make a big batch on Sunday, and by Thursday, I’m still digging into the leftovers—packed for work, tossed in wraps, or just eaten straight from the fridge. The quinoa keeps it hearty, so you’re not left hungry.
- Budget Meal, Big Payoff: Fresh avocado and grilled chicken might sound fancy, but this salad stretches every ingredient. A single avocado feeds two servings, the quinoa bulk-buy is a protein powerhouse, and chickpeas? Cheap, filling, and packed with flavor. My wallet and my taste buds win.
Step-by-step instructions for building a 10-Layer salad
Layering creates both visual appeal and structural integrity—each component must balance texture and moisture.
👨🍳 Step 1: Prepare the Base Layers for Stability
Start with the sturdiest elements that will form your salad's foundation. In a large mixing bowl, combine the 1 cup quinoa (cooked according to package instructions) and the 1.5 cups chickpeas. Drain any excess liquid from the chickpeas first—they should be completely dry to prevent sogginess in your layers. Add 2 tbsp lemon juice and 0.25 cup olive oil, tossing gently until evenly coated. This combination creates a neutral, protein-rich base that holds up to the layers above.
Next, spread this mixture evenly across the bottom of a large glass or ceramic dish (at least 9x13 inches). Press down lightly with a spatula to create an even, compact layer. This step is critical—uneven bases lead to collapsing salads. The quinoa and chickpeas will absorb any moisture from the layers above, preventing a watery mess.
🥘 Step 2: Build the Crunch and Acid Layers
For the second layer, combine the 0.5 cup almonds and 1 cup cherry tomatoes in a small bowl. Toss lightly with 1 tsp salt and 0.5 tsp black pepper to enhance their natural flavors. Spread this mixture evenly over the quinoa-chickpea base, creating a uniform layer about ¼-inch thick. The almonds provide structural integrity while the tomatoes add bright acidity that cuts through richer flavors.
Add the 0.25 whole red onion (thinly sliced and drained) and 0.5 whole cucumber (thinly sliced) as the third layer. Arrange these in a crisscross pattern over the tomatoes—this creates visual interest while maintaining even distribution. The onion's sharpness and cucumber's crispness will complement the heartier base layers. Press down very lightly to ensure adhesion without compacting the vegetables.
🥘 Step 3: Add the Protein and Creamy Elements
For the fourth layer, arrange the 1.5 lb grilled chicken breast (sliced thin) in a single layer over the onion and cucumber. The chicken should cover about 75% of the surface area, leaving small gaps for visual appeal. Sprinkle 0.5 cup feta cheese (crumbled) evenly over the chicken. The feta adds a creamy contrast that balances the protein's richness while its saltiness enhances all layers below.
Here's where texture becomes crucial: the chicken should be cool enough to handle but still retain its warmth. If it's too hot, it will steam the layers below and create condensation. Let it cool for 5-10 minutes before assembling if it's freshly grilled. The feta should be distributed evenly—clumps will create uneven moisture distribution in your final salad.
🥘 Step 4: Layer the Leafy Greens and Final Touches
For the fifth and final structural layer, arrange the 2 whole romaine lettuce (chopped into bite-sized pieces) evenly over the feta. The lettuce should be dry—pat any excess moisture with paper towels before adding. This layer creates the salad's signature "stacked" appearance while providing freshness. Spread the lettuce in a slightly overlapping pattern to ensure complete coverage of the layers below.
Finally, add the 1 whole avocado (sliced into thin strips) arranged decoratively on top. The avocado should only touch the lettuce layer—direct contact with other ingredients causes browning. This top layer adds vibrant color and healthy fats that complement the salad's overall balance. The avocado's creamy texture contrasts beautifully with the crisp lettuce and crunchy almonds.
🥘 Step 5: Dress and Chill for Maximum Freshness
In a small bowl, whisk together the 0.5 cup balsamic vinaigrette with any remaining 1 tbsp lemon juice (reserve some for garnish). Drizzle this dressing evenly over the entire salad, starting from the edges and working toward the center. This prevents pooling that could create soggy spots. The dressing should coat all layers but not saturate them—you want each bite to deliver flavor without overwhelming texture.
Cover the dish tightly with plastic wrap and refrigerate for at least 2 hours before serving. This chilling period allows flavors to meld while maintaining structural integrity. When ready to serve, drizzle with any remaining lemon juice and additional vinaigrette if needed. The salad will hold its shape beautifully when sliced—each layer remains distinct and delicious, delivering a perfect balance of textures and flavors with every bite.
Pro Tips For Making 10 Layer Salad
- Dry the Quinoa Properly: Cooked quinoa clumps like a science experiment gone wrong? Spread it on a baking sheet and let it cool completely—no foil, no rushing. I learned this after three soggy salads where the layers turned into a sad, mushy mess.
- Prep Avocado Last: Avocado’s your star, so slice it right before assembling. The flesh darkens fast, and nobody wants a salad where the green turns to gray halfway through. Keep the pit on until the last second—it slows oxidation, even if it feels like overkill.
- Chill the Chicken: Grilled chicken straight from the pan? Too hot, too tough. Let it cool to room temp first, then slice against the grain. Cold chicken stays juicier, and the salad won’t wilt under a sauna-like protein blanket.
- Layer by Texture: Start with the crisp (lettuce), end with the soft (avocado). Skip the "just dump it all in" approach—this isn’t a smoothie. Each layer needs its own space to shine, or you’ll end up with a flavor muddle instead of a harmonious bite.
Common mistakes when making this recipe
Uneven Base Layer
Skipping the quinoa-chickpea foundation or using wilted greens like spinach or iceberg will cause your salad to collapse. I see this all the time when people start with delicate greens—they get soggy within hours. Always begin with sturdy, dry ingredients like romaine or butter lettuce, and press the quinoa-chickpea base firmly to create a solid foundation. 🥬
Over-Saturating Dressing
Adding dressing before assembling layers or drowning the salad in it will turn crisp ingredients into a mushy mess. The balsamic vinaigrette should be drizzled evenly over the top layer (lettuce) just before serving. If you must dress ahead, use only 2 tablespoons and store it separately until assembly. The goal is moisture control, not soaking.
Skipping the Chill Time
Rushing to serve without the 2-hour refrigeration means flavors won't meld and textures will suffer. This is especially true for avocado and tomatoes—they release moisture that needs time to absorb into the base layers. I've learned the hard way that skipping this step leads to a watery, sad salad. Patience pays off with perfect texture and flavor balance.
Uneven Layer Distribution
Piling ingredients in the center creates an unstable structure that collapses when sliced. Spread each layer evenly across the entire surface, pressing down lightly with a spatula. The almonds and tomatoes should form a uniform ¼-inch thick layer—this prevents gaps where moisture can pool. Think of it like building a sandcastle: every layer needs equal support.
Adding Avocado Too Early
Placing avocado slices in the middle layers causes them to oxidize and turn brown before serving. The avocado belongs only on the very top, touching just the lettuce layer. If you need to prep ahead, toss avocado slices with 1 teaspoon lemon juice and store them separately in an airtight container. This keeps them vibrant for up to 24 hours before assembly.
Using Wet Ingredients
Freshly washed greens or un-drained chickpeas introduce excess moisture that ruins texture. Always pat lettuce dry with paper towels and drain chickpeas thoroughly before layering. I keep a clean kitchen towel handy to blot any excess liquid from ingredients like cucumber or tomatoes. This small step prevents the entire salad from becoming a waterlogged disappointment. ❄️
Nutrition facts
Frequently asked questions
Can I make this layered salad ahead of time?
Yes! Assemble everything except the avocado and dressing, then refrigerate for up to 5 days. Store the dressing separately and add it just before serving. For the avocado, slice it with 1 teaspoon lemon juice and keep it in an airtight container—add it to the top layer within 24 hours of serving to prevent browning. This keeps your salad fresh and crispy for meal prep.
What if I don’t eat chicken? Can I substitute?
For a vegetarian version, swap the chicken for grilled tofu or marinated tempeh. Vegans can use roasted chickpeas or white beans for extra protein. Keep the portion size similar—about 1.5 cups of substitute—to maintain the salad's structure and heartiness. The quinoa-chickpea base already provides fiber, so you won’t lose texture.
Why does my salad get soggy even after layering?
Sogginess usually happens from excess moisture in ingredients or dressing. Always pat lettuce dry and drain chickpeas thoroughly. Dress only the top layer with 2 tablespoons of vinaigrette and store it separately. The 2-hour chill time is critical—it lets the base absorb moisture evenly. If your salad still gets soggy, reduce the cucumber or tomato portions slightly.
Can I use this recipe for a party or buffet?
Perfect for gatherings! Assemble the salad in a large glass dish and slice it into wedges for easy serving. Use clear containers so guests can see the layers—it’s both practical and visually stunning. For extra flair, arrange toppings like toasted nuts or cheese in decorative patterns. Just add dressing at the table to keep everything crisp. This salad serves 8-10 as a side or 4-6 as a main dish.
What’s the best way to store leftovers?
Divide leftovers into airtight containers with parchment paper between layers to prevent sticking. Store in the fridge for up to 5 days. Reheat gently (if using grains) or serve cold. For longer storage, freeze individual components like quinoa, chicken, or chickpeas separately—assemble fresh when ready. Always add dressing just before eating to maintain crispness.